OLD ARTIST PAGE TUTORIAL
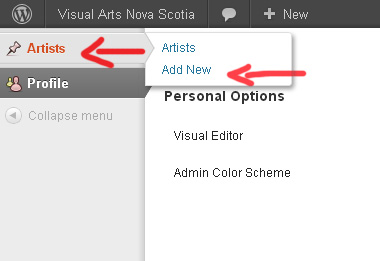
1. After logging in, in the menu along the left hand side, there is an item for Artist Pages. Click that.
2. In the field for the title at the top, enter the name of the Artist (your name).

3. Along the right hand side, you’ll see options for regions and mediums. Please, check off the main region as well as the city or town within that region—in this example Halifax Metro and Halifax. Click Choose from the most used mediums, then choose each of the mediums you would like to be associated with—in this example oil and painting—or add a new medium above.

4. Click Add Media to access the image uploading screen:

5. Click the Select Files button, and choose the images from your computer you would like to upload. Upload only a quality version of the image and the system will automatically create a thumbnail and resize the images to display appropriately on the website.
Artists may upload a maximum of 6 images into the gallery on their Artist Page (2 rows, 3 columns). In order to maintain a high standard for the website Artist Pagee, professional quality images are necessary. Documentation should show art work only; background should be solid and neutral. Uploaded images can be no larger than 100MB.

6. Select the image you want to edit and enter the title of the artwork under Title, Alternate Text and Caption and additional information under Description—as in the example below.
Description of documentation should include “Title, Medium, Dimensions, Year of Completion”. The artist owns the copyright to his/her works and agrees to grant Visual Arts Nova Scotia license to reproduce the above-named images on the VANS homepage.

7. Select Create Gallery on the left of the screen, and then select all of the images you want to insert by clicking on them. (If by clicking on them you are deselecting the others you want, just hold down the ctrl button or the command button while you are clicking on them.) Then click Create a New Gallery at the bottom right.

8. The Edit Gallery window will then let you reorder the images by dragging them into place. On the right portion of this screen in the gallery settings, choose columns – 3 (this is the best fit for the VANS website) then click the button to Insert gallery.

9. If you’ve inserted the gallery into the content of your page, you’ll see a blue box with an icon of a camera and photo (see below). This is a placeholder indicating the position of your thumbnail images on the Artist Page. To see a working preview of the page, you’ll need to click on Preview (Step 17).
To edit your images, click once on the blue placeholder box, then click the small icon in the top left as indicated in the image below.

10. Place your cursor below the gallery box and type or paste in your artist statement and selected biography.
Text must be well written; with proper punctuation, spelling and grammar. The word count on the artist statement and biography can not exceed 150 words per each section. Please read the Artist Page Guidelines referencing how to professionally write about your work, for guidance.

11. The usual controls for bold and italics, etc. are available at the top of this content window.

12. Below the content box, there is a box labelled Excerpt. This is a small description which is shown along with search results on the website. Typically, the artist statement is entered here.

13. The contact information (address, email, studio hours, phone number and website) are entered in the Contact information box located on the right hand side of the page or below the excerpt box. Be sure to include the full website address – in http://www.yourwebsiteaddress.com/ – to ensure that it links to your website.

14. The last step is adding your location to the interactive map. In addition to the address above, you need to scroll down to the Location box and type or paste in your address (specific street address or city/town name) as indicated. Hit the enter or return key to verify your location as a pinpoint on the map.

15. Finally, you can Preview your artist page from the Publish box near the top right of the page. Feel free to continue to edit the page and Save a Draft if you wish to continue working on it later, or Submit for Review and the staff at VANS will review and publish your artist page.

Artist Pages will be approved by VANS, only when they meet the professional standards as set by the Artist Page Guidelines.
Note: The google location map will not be active until an artist page is published live.
Updating an Artist Page
To edit or update an existing Artist Page, Log in to your account, then click on Artist Pages along the left hand menu, Search Your Name in the search bar at the top right, then select Edit by moving your cursor underneath your artist page—as indicated in the image below.

Continue to edit the content as shown above.
Watch the online video tutorial on YouTube!
If you are having any difficulty and you require some assistance, please do not hesitate to contact us.